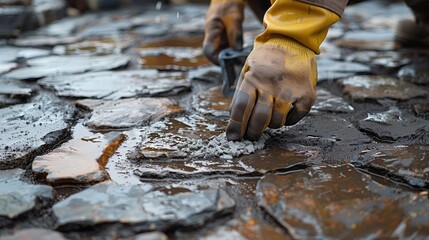
Pavers add charm, durability, and value to outdoor spaces. Whether used for driveways, patios, walkways, or pool decks, they create a clean, stylish, and functional look. However, exposure to sun, rain, dirt, and everyday wear can take a toll on their appearance over time. That’s where paver sealing comes in. By applying a protective layer, sealing preserves the beauty of pavers while extending their lifespan.
This guide explains why paver sealing is important, the benefits it provides, and how to maintain sealed surfaces for long-lasting results.

Why Paver Sealing Matters
Unsealed pavers are vulnerable to a range of issues. Weather exposure, weeds, stains, and fading can make even the best-designed surfaces look worn out. Sealing provides a barrier that protects pavers from these common problems.
The key benefits of sealing include:
- Protection from stains – Oil, grease, and spills are less likely to seep into the surface.
- Color enhancement – Sealing brings out the natural tones of stone, brick, or concrete.
- Weed prevention – Sealant hardens the sand between joints, reducing weed growth.
- Weather resistance – Sealed surfaces resist water absorption and damage from freezing and thawing cycles.
- Easier maintenance – Dirt and debris are less likely to stick to sealed pavers, making cleaning simple.
Sealing is an investment that keeps outdoor spaces looking fresh and vibrant while minimizing long-term repair costs.
Types of Paver Sealers
Not all sealers are the same. Choosing the right type ensures your pavers receive the best protection.
Water-Based Sealers
These are eco-friendly options that provide a natural, matte finish. They dry quickly and are less likely to trap moisture.
Solvent-Based Sealers
These offer a glossy or wet-look finish that enhances color and sheen. They are durable but may require longer drying times.
Penetrating Sealers
Instead of forming a film on the surface, these soak into the pavers to create a protective barrier from within. They are excellent for long-term protection without altering appearance.
The choice between sealers depends on your goals—whether you want a natural look, a glossy finish, or maximum durability.
When to Seal Pavers
Timing plays a major role in successful paver sealing. Sealing should generally be done after installation, once the pavers and joint sand have settled. This allows moisture to evaporate and prevents trapping water beneath the sealer.
For existing pavers, sealing is best done after a thorough cleaning to remove dirt, stains, or moss. Experts recommend resealing every two to three years, depending on foot traffic, climate, and exposure to the elements.
How to Prepare Pavers for Sealing
Preparation is just as important as the sealing process itself. Skipping this step can lead to uneven results or poor protection.
Steps to prepare pavers for sealing:
- Clean thoroughly – Remove dirt, debris, and stains with pressure washing or appropriate cleaning solutions.
- Remove weeds – Clear out weeds from joints and edges.
- Reapply joint sand – Sweep sand into the joints to stabilize pavers and prepare for sealing.
- Allow drying time – Ensure pavers are completely dry before sealing to avoid trapping moisture.
Proper preparation guarantees a smooth application and long-lasting finish.
The Paver Sealing Process
Once the surface is clean and dry, sealing can begin.
- Apply evenly – Use a sprayer or roller to coat the surface uniformly.
- Cover joints – Make sure the sealant penetrates between the pavers for added strength.
- Avoid overapplication – Too much sealer can create a sticky or uneven finish.
- Allow curing time – Keep the area free from foot traffic or vehicles until the sealer fully cures.
Following these steps helps achieve a professional-looking result that enhances both function and aesthetics.
Common Mistakes to Avoid
While sealing is effective, mistakes can reduce its benefits. Some common errors include:
- Sealing too soon – Applying sealer on newly installed or wet pavers traps moisture.
- Skipping cleaning – Dirt and stains sealed beneath the surface become permanent.
- Over-sealing – Applying too much product can cause peeling or discoloration.
- Ignoring weather conditions – Sealing in rain or extreme heat leads to poor results.
Avoiding these mistakes ensures that the protective layer works effectively and looks great.
Maintaining Sealed Pavers
Sealed pavers require less maintenance, but regular care keeps them in excellent condition.
Maintenance tips:
- Sweep regularly to prevent dirt buildup.
- Rinse with water to remove dust and debris.
- Clean spills promptly to avoid staining.
- Reapply sealer every few years as needed.
Simple upkeep extends the benefits of sealing and ensures outdoor areas remain attractive year-round.
Benefits of Professional Paver Sealing
While sealing can be a DIY project, hiring professionals often delivers superior results. Experts have the right tools, products, and techniques to handle large areas efficiently. They also know how to address problem spots like stubborn stains or uneven paver surfaces.
Professional sealing not only saves time but also provides peace of mind, knowing the job is done right for long-lasting protection.
Paver sealing is a smart investment for anyone who values the appearance and durability of outdoor spaces. By protecting against stains, weeds, fading, and weather damage, sealing enhances both beauty and functionality. With the right preparation, application, and maintenance, paver sealing keeps driveways, patios, and walkways looking their best for years to come.
Whether you choose to seal your pavers yourself or hire professionals, taking this step ensures your outdoor surfaces remain strong, clean, and visually appealing. With consistent care, paver sealing turns your hardscape into lasting features that withstand time and the elements.